Organising teacher supplies
When I first starting teaching, I kept everything… and I mean everything! I kept spare paper copies of every resource I ever used, resources other teachers were throwing out, bargains at the op shops, buttons, shells, pebbles and on and on the list went. So, the result of this habit meant that I had a lot of “stuff.”
Who am I? Well, I am an Early Childhood teacher with nearly 20 years of full-time classroom teaching experience (yes, I’m still standing… just, my knees are a bit wobbly now!). Being an early childhood teacher means, I know what it’s like to have a lot of “stuff.” I have felt what it’s like to be completely overwhelmed with the management of this “stuff.” I have often felt that my job is primarily being a “removalist” or a “stuff mover.” Can you relate to this? Yep, I’ve been there too. Those days of keeping everything are a thing of the past! Read on and find out how I do it… Then scroll down to see just some of my before and after pics!
This article is great for new teachers (because if you can get a system going the right way in the beginning then your life is about to get a whole lot easier) AND experienced teachers like me (because you may have collected a whole heap of stuff by now and not know how to even get started with organising – or find anything). No one teaches you how to get organised in university, yet being organised is so important in your daily teaching life. Everything runs so much smoother when you can find your “stuff.” I truly hope these tips help you.
Firstly, why get organised? We are busy enough just trying to lesson plan and prep right?
Just take a minute to reflect and think… how much time have you honestly wasted on looking for a resource? Truthfully, we’ve probably all wasted hours of our precious time looking for a book or a learning resource that we KNOW we have but we just can’t remember where we put it.
The time you spend getting organised could be a pain but will undoubtedly save you hours down the track. Even getting a system in place when things are not organised just yet, gives your mind some clarity and peace knowing that you at least know WHERE things are going to go!
Another bonus is that, if you ever need to take leave, other people who temporarily replace you be able to find resources, you will be able to lead them in the right direction and you will have less chance of arriving back to a hot mess!
How to organise teacher resources
Tip 1 – Different categories
To begin with, you need some type of semantic categories to start this process. I have some very broad main categories that I sort my resources into. As you begin to sort through your resources, you need to create piles, just like you would if you were sorting your clothes!
Here are my categories.
- teaching resources (such as files, teaching books)
- subject area resources (such as math, literacy, science, HASS, art)
- stationery
- hands-on resources (such as games, counters, dice, teddies)
- class decorations (such as think posters, fabric, borders)
- books I read to students
Before you begin to have a major sort, decide what your main categories will be. Doing this activity will also inform you as to what you have doubles of or what you need more of! Tips 1-7 represent ideas that help to organise your personal teaching resources.
Tip 2 – Subject area
Why do subject area separation? Well, it’s just easier, isn’t it? This way you also know exactly what you have in each learning area and where the gaps are. I put my math resources one side of the cupboard and my English resources on the opposite side. It’s that simple. What goes in my subject area pile? Games for students, learning tools (e.g. dice, letter tiles), cards and so on.
If you are a subject specialist teacher then this may be easier for you however, you may have micro categories within your subject area (e.g. Science – lifecycles, materials and so on). You. may also like to organise your resources into year levels. I do not do this by year level anymore.
If you teach ALL the subjects like me, you will also have subcategories within each subject area (for example, mathematics has number, geometry and so on) but I strongly suggest leaving this sort of organizing for after you have done this initial organizing activity. Plus, I also suggest not over complicating things. I have done this in the past and it does not work if your system is too complicated. Trust me! But, then, you do you!
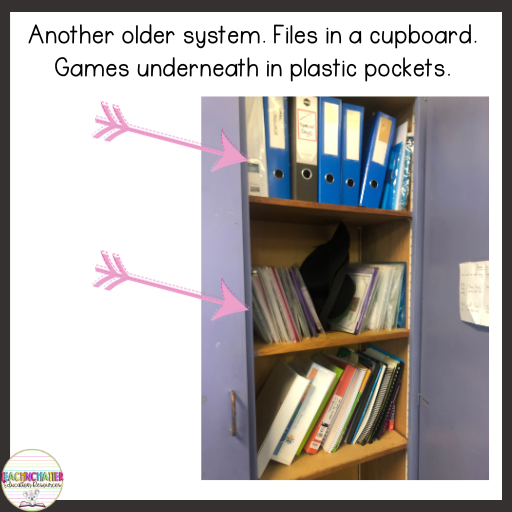
Tip 3 – Teacher resources – Books and Files
I tend to put my file and books in a different area than my student games and fine motor resources. Now, when it gets to paperwork, I could probably go quite into depth about that but for the sake of this article, I’ll keep it brief!
I only keep paperwork for what I truly need in a rush. I find it easier for me to keep my math and English worksheets that I know I use frequently, in a lever arch file. On my DOTT (duties other than teaching) day, I can grab my file and print what I need for the week ahead. Why don’t I go paperless? I have tried this but ultimately, I still must spend time searching through a usb drive and I find it quicker to grab my file and photocopy. I have kept some resources that I do not use as frequently, on my usb plugs. I have a usb drive for each subject (this reduces my searching time!). Every now and then, I go through usb plugs and delete resources no longer required (not as often as I should though).
I have a filing cabinet within my desk. I do not recommend these for all your teaching worksheets and information. Why? If you’ve moved as much as I have, you’ll realise. These are NOT easy to move. I must keep some documents in these draws for general school information. Again, I only keep what I absolutely must keep. I am brutal with this now.
Tip 4 – Stationery
This gets a mention all by itself. I keep my teacher stationary separate from student stationery resources. My student resources are in the classroom area (either in a box or on a shelf that is labelled ‘student resources’). In my office area (or you may have a cupboard), I sort my resources into categories. Paper products are kept in trays, small items are kept in a box drawer unit and so on. I bought mine from Spotlight. So, I store these in one area (around my desk area), they are sorted by size and labelled. If another teacher needs to get an item, they will find it easy enough!
Stationery items can get disorganized in a very quick time. It’s so easy to prevent this by simply having a place them to go and having everything labelled. If you do not have fancy storage areas, don’t stress. I have literally thrown my stationery items into a labelled crate and box before. If your resources can be found, you are winning!
One thing I no longer do is keep multiple stationery tubs and resources around the classroom. All my stationery is in one spot (behind my teacher desk), and I put things back after I use them.
Tip 5 – Hands-on Resources
So, within this category I put; small toys that I use in play-centers, counting resources (e.g. shells, rocks, gems), small bowls that I use on table-top activities, and other resources. If you are an early childhood teacher, you will probably be amazed at how many little odd-bod things you have. I also seem to have a collection of fine motor resources within this category but since they are still hands-on resources, I keep it to that.
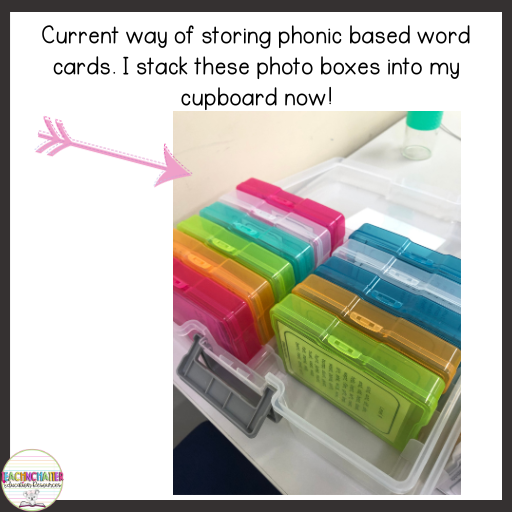
I use small take-away food containers or any other containers that I have been handed down. As they are all the same size, they stack nicely on my shelf. I prefer clear containers too because obviously I can see through to what is inside and this means I do not always have to label these containers. I use these containers for small items such as beads, pebbles, shells, buttons and so forth. I put larger items (like stuffed toys) into a crate and label it.
Tip 6 – Classroom Decoration
I always put this collection of resources away from my general teaching resources. When I am setting up the classroom at the beginning of each year (or redesigning for a new theme each term), I know that I can quickly go to this area (or crate) and pull out what I need to use. I do this to save time. I also know that I can sort through this tub quickly. If things are looking a bit old and tattered after a while, I can just throw them out and replace them.
This collection of resources is often a bit oddly shaped, due to the nature of what they are. For example, my A4 posters will all fit neatly inside a crate. I have them labelled within a plastic folder under each theme or topic. My leaves, fabric, lights, and other decorations are not so easily stored. For these odd-shaped items, I have a crate labelled ‘material’ and a box labelled ‘class decorations.’ I use clear (see-through) containers for all of my resources.
I have seen many different sorting and organising schemes talked about over the years I have done research into this topic. A lot of American teachers seem to collect resources and sort them according to the month. If you are a kindergarten (or preschool) teacher, this is fine. For me, I simply do not know what year level I am going to be teaching from year to year. Having things organised this way would not be easy for me. I have found that I use all my resources in a Year Two classroom. This means I am using the same resources that I did in kindergarten, Prep and Year One, only they serve a different purpose. So, having my resources available year-round is just easier for me. Having resources to suit the differentiated levels within my classroom is an important focus for me. Your needs may be different so do what suits you!
Another tip on themes. I used to redecorate my classroom in different themes every term. Yep! I did. I can’t believe I invested the amount of time into doing so. Now, I stick to one overall classroom décor theme for the year and change up learning resource posters only, if required. To further simplify your life, you can always choose one décor theme you love and stick with it. I used to keep tubs of different décor themes. Yep, I did. I have no space in my brain for this anymore. This is totally your choice though!
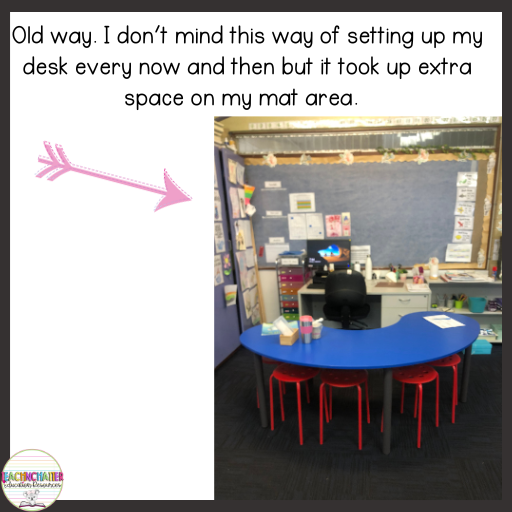
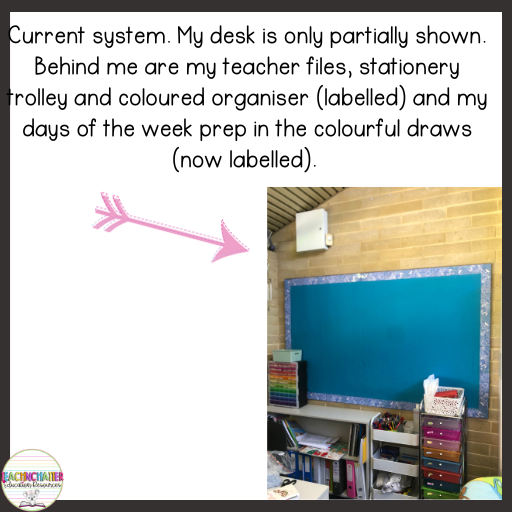
Tip 7 – Teacher Desk
I try to keep nothing on my desk but my teacher computer and maybe a plant (that’s it). I like to have something that Marie Kondo says, “sparks joy.” For me that is a plant or a flower. If my desk gets cluttered, I immediately feel cluttered in my head. Just the same as my room. All of my teacher resources sit on a shelf behind me (accessible, labelled and out of sight from where I am facing).
Tip 8 – School-based Resources
I have another cupboard (much smaller) and keep the school owned resources in this cupboard. I try my best to only put in (and borrow) resources that are used for each term and swap them out each term. I do not mix my personal teaching resources (financed by myself) with school resources.
Tip 9 – Student resources
I have large zip lock bags for student spare stationery items to go into and all of these are named and go in one tub. I think I purchased for the rub for around $5 at Kmart.
PROBLEMS?
Ok, so, I can almost hear some of you out there saying these things aloud and I will briefly address them here…
1 – I don’t have a cupboard like you mentioned! Fine. Put your resources in a labelled crate and stack the crates. I have done this before. It’s not pretty, but it works. Focus on what works! Cover it with pretty material if you must.
2 – I don’t have time to sort. Start with ONE learning area, not the whole collection of your resources.
3 – I’m starting out and I don’t even have resources. Draw a plan of how you WILL sort them out. Then as you collect resources, you will be ready to go!
BENEFITS OF BEING ORGANISED
The benefits…. ah, there are so many, and I’ve already mentioned how being organised will literally save you hours of time. But there are other benefits too. I have noticed that when I walk into an area that is filled this mess or too many objects full stop, I feel overwhelmed or just plain horrible. I feel immediately calmer walking into a blank, spacious area. That simple! I even notice this in my own house. I have a lounge room at the entry of my home. It is sparce with off-white carpet, a lounge suite and that is it! It’s not a very “used” area of my house. It’s a peaceful place to go for reading or doing a workout though. As soon as I stand in this room, I feel calm. Your class can feel like this too!
I hope this helps you out! If you have any further tips, please leave them in the comments section.
I wish you all the best if you are on a decluttering mission. I wish I had done mine years earlier.
All the best,
Jennifer